✓ Decoupage is the art of decorating an object by gluing colored paper cutouts onto it in combination with special paint effects, gold leaf, and other decorative elements.
✓ The word 'decoupage' comes from the French verb 'découper,' meaning 'to cut out.'
✓ It gained immense popularity in 17th-century Venice, where it was known as 'lacca povera' or 'poor man's lacquer.'
✓ Decoupage can be applied to almost any surface, including wood, metal, glass, ceramic, and plastic.
✓ The key to successful decoupage is the careful layering of paper, adhesive, and protective sealants to create a smooth, durable, and seamless finish.
How It Works
1
Prepare Your Surface
Ensure your chosen item is clean, dry, and smooth. Sand rough surfaces and apply a base coat of paint or primer if desired for optimal adhesion.
2
Cut Out Your Designs
Carefully cut out images from paper, napkins, or fabric, paying attention to fine details. For a seamless look, consider tearing edges rather than cutting.
3
Apply and Adhere
Brush a thin layer of decoupage medium onto a small section of your object, then carefully position your cutout. Smooth out any bubbles or wrinkles with a soft brush or your finger.
4
Seal and Finish
Once all cutouts are adhered and dry, apply multiple thin coats of decoupage medium or a clear sealant over the entire surface, allowing each coat to dry completely. This protects the design and creates a durable, glossy finish.
Understanding the Fundamentals: What is Decoupage Craft?
Photo: Sedanur Kunuk / Pexels
At its heart, decoupage is a captivating and accessible art form that transforms ordinary objects into extraordinary pieces through the simple act of cutting, pasting, and sealing. The very essence of 'what is decoupage craft' lies in its name, derived from the French word 'découper,' meaning 'to cut out.' This ancient technique, with roots tracing back to Siberian burial mounds where nomads used felt cutouts to decorate tombs, truly blossomed into a recognizable art form in 17th-century Europe. Venetian cabinetmakers, unable to meet the demand for expensive oriental lacquered furniture, ingeniously created their own version by cutting out prints, gluing them onto furniture, and then applying multiple layers of protective varnish. This method, often referred to as 'lacca povera' or 'poor man's lacquer,' allowed them to mimic the luxurious look of imported goods at a fraction of the cost, making it an early example of creative craft innovation.
Today, decoupage remains incredibly popular due to its versatility and the relatively low barrier to entry. You don't need to be a skilled painter or sculptor to achieve stunning results. All you need are some paper cutouts – be it from magazines, specialized decoupage papers, napkins, or even fabric – a suitable adhesive (typically a decoupage medium that also acts as a sealant), and an object to decorate. The beauty of decoupage lies in its ability to revive old items, personalize new ones, or even create entirely new pieces of art. From furniture to picture frames, jewelry boxes to decorative plates, almost any surface can become a canvas for your decoupage dreams. The process involves meticulous cutting, careful placement, and the patient application of many layers of sealant to create a smooth, durable finish that appears almost painted onto the surface. This layering is crucial; it's what gives decoupaged items their characteristic depth and resilience, making them not just pretty, but functional works of art. The tactile sensation of running your hand over a perfectly decoupaged surface, feeling no edges of the paper, is a testament to the artisan's skill and patience. It’s a craft that encourages creativity, attention to detail, and a wonderful way to recycle and repurpose, aligning perfectly with modern sensibilities of sustainability.
The Evolution of Decoupage: From Venetian Lacca Povera to Modern Art
Photo: Sedanur Kunuk / Pexels
The journey of decoupage from its humble beginnings to a cherished modern craft is a fascinating one, showcasing its enduring appeal and adaptability. While its earliest forms can be traced back centuries, the 17th century in Venice marks a pivotal moment. As wealthy Europeans developed a taste for exotic Asian lacquered furniture, particularly from China and Japan, Venetian artisans sought a way to capitalize on this trend without the immense cost and time involved in traditional lacquering. They found their solution in 'lacca povera,' or 'poor man's lacquer.' This involved applying printed images, often depicting pastoral scenes or Chinoiserie designs, to furniture surfaces and then sealing them with numerous coats of varnish. The aim was to create a finish so smooth and deep that the paper designs appeared to be an integral part of the furniture itself, indistinguishable from genuine lacquer work. This ingenious method not only satisfied the market demand but also established decoupage as a legitimate decorative art form.
The popularity of decoupage continued to grow, reaching its zenith in the 18th century with figures like Madame de Pompadour and Marie Antoinette reportedly engaging in the craft. It became a favorite pastime among European aristocracy, who would spend hours meticulously cutting and pasting intricate designs. The Victorian era saw another surge in decoupage, with the availability of mass-produced prints and scrapbooking becoming popular. Ladies would adorn screens, boxes, and albums with sentimental images, creating elaborate collages. The 20th century brought new materials and techniques, such as specialized decoupage glues and acrylic sealants, making the craft even more accessible and durable. Artists like Pablo Picasso and Henri Matisse, though not traditional decoupage artists, explored collage techniques that share a conceptual lineage with decoupage, emphasizing the artistic potential of cut paper.
Today, decoupage is no longer just a technique for mimicking expensive finishes; it’s a standalone art form celebrated for its decorative and expressive qualities. Modern decoupage artists experiment with a vast array of materials, from vintage comics and botanical prints to fabric scraps and photographs. The internet and social media have further fueled its popularity, with countless tutorials and inspirational projects shared daily. From upcycling old furniture to creating personalized gifts, decoupage offers an endless realm for creative expression. It bridges the gap between fine art and craft, allowing individuals to transform everyday objects into unique, personalized statements. Its history is a testament to human ingenuity and the timeless desire to beautify our surroundings through accessible, yet sophisticated, artistic means.
Essential Tools and Techniques for Decoupage Mastery
Photo: PNW Production / Pexels
Embarking on your decoupage journey requires a basic understanding of the essential tools and techniques that will ensure successful and beautiful results. While the craft is forgiving, having the right supplies and knowing how to use them effectively can elevate your projects from good to truly exceptional. The foundation of any decoupage project begins with your chosen surface. This could be wood, glass, metal, ceramic, plastic, or even canvas. The key is to ensure it’s clean, dry, and smooth. For porous surfaces like wood, a light sanding and a coat of primer or base paint can provide an ideal canvas for your designs. For non-porous surfaces like glass, a thorough cleaning with rubbing alcohol will ensure proper adhesion.
Next, you'll need your paper cutouts. The options here are limitless: specialized decoupage papers, decorative napkins, gift wrap, magazine clippings, comic book pages, old maps, fabric scraps, or even printed digital images. The type of paper influences the final look; thinner papers blend more seamlessly, while thicker papers might require more adhesive and careful smoothing. Precision cutting tools are paramount. Small, sharp scissors, an X-Acto knife, or a craft knife with a self-healing mat will allow you to achieve intricate details. Some crafters prefer to tear the edges of their images for a softer, less defined look, which can also help to hide the paper's edges.
The heart of decoupage is the adhesive, typically a decoupage medium like Mod Podge. These specialized glues not only adhere your paper but also act as a sealer and often provide a protective finish. They come in various finishes – matte, gloss, satin – allowing you to control the final aesthetic. Application brushes are crucial for both applying the medium and smoothing out your cutouts. Soft, flat brushes are ideal for applying the glue, while a small, soft brayer or a plastic squeegee can help eliminate air bubbles and wrinkles, ensuring a smooth, professional finish. Patience is also a vital tool; allowing each layer to dry completely before applying the next is critical to prevent bubbling, tearing, or cloudiness. Multiple thin coats of sealant (your decoupage medium or a separate varnish) are applied over the entire finished piece to create a durable, waterproof, and seamless surface. This final step is what gives decoupaged items their characteristic hard, lacquered appearance, protecting your beautiful designs for years to come. Mastering these tools and techniques is fundamental to unlocking the full potential of decoupage art.
Creative Decoupage Project Ideas and Troubleshooting Tips
Photo: Sedanur Kunuk / Pexels
Once you understand the basics of what is decoupage craft, the real fun begins: exploring the vast world of creative project ideas and learning how to troubleshoot common issues. Decoupage is incredibly versatile, making it perfect for personalizing almost anything. Here are some inspiring project ideas to get you started:
* **Upcycled Furniture:** Give an old dresser, chair, or side table a new lease on life by decoupaging it with maps, botanical prints, or even fabric. This is a fantastic way to create bespoke pieces that reflect your style.
* **Decorative Boxes:** Transform plain wooden or cardboard boxes into beautiful storage solutions or gift containers. Use themed papers for holidays, special occasions, or to match room decor.
* **Personalized Home Decor:** Adorn picture frames, vases, trays, or even switch plate covers with cherished photos, intricate patterns, or meaningful quotes.
* **Jewelry and Accessories:** Create unique pendants, earrings, or bangles by decoupaging small images onto blank jewelry bases and sealing them with a resin-like finish.
* **Customized Plates and Coasters:** While not food-safe for direct contact, you can decoupage the underside of clear glass plates or the top of ceramic tiles to create stunning decorative pieces or coasters (with a waterproof sealant).
Even experienced crafters encounter challenges. Here are some common troubleshooting tips:
* **Bubbles and Wrinkles:** This is perhaps the most common issue. Prevent it by applying a thin, even coat of medium, carefully placing your cutout, and then immediately smoothing it from the center outwards with a soft brush, brayer, or even a credit card. If bubbles appear after drying, you might be able to prick them with a pin and re-smooth, then apply another thin coat of medium.
* **Paper Tearing:** Very thin papers (like napkins) are prone to tearing when wet. Work gently and apply the medium to the surface first, then carefully lay the dry cutout on top. For napkins, separate the printed ply from the plain plies before use.
* **Cloudiness/Stickiness:** This often occurs from applying coats too thickly or not allowing enough drying time between layers. Ensure thin coats and complete drying. High humidity can also be a factor; work in a dry, well-ventilated area. If sticky, a final clear acrylic spray sealant can often help.
* **Visible Edges:** To minimize visible paper edges, consider tearing rather than cutting the images, or sand very lightly with fine-grit sandpaper between dried sealant layers to blend the edges before applying more sealant.
By embracing these ideas and learning to navigate potential pitfalls, your decoupage craft journey will be both rewarding and filled with beautiful creations.
Comparison
Feature
Decoupage Medium (e.g., Mod Podge)
White Craft Glue (e.g., Elmer's)
Acrylic Varnish/Sealant
Adhesion
Strong, specifically formulated for paper to various surfaces
Good for paper, less versatile on non-porous surfaces
Dries clear, but offers minimal protection/durability
Excellent protection and various finishes, not an adhesive
Drying Time
Fast initial tack, full cure 24+ hours
Fast initial tack, can be tacky longer
Varies by product, generally fast surface dry
Water Resistance
Good once fully cured and multiple layers applied
Poor, re-solubilizes with water
Excellent, designed for water resistance
Ease of Use
Very easy, all-in-one product
Easy, but limited scope
Easy, but requires separate adhesive
Best For
All-in-one decoupage projects
Simple paper crafts, not ideal for durable decoupage
Final protective layer over decoupaged items
What Readers Say
★★★★★
"I've always wondered what is decoupage craft, and this guide made it so clear! My first project, a decoupaged tray, turned out beautifully and was much easier than I expected. I'm hooked!"
Sarah J. · Austin, TX
★★★★★
"As a beginner crafter, this article was incredibly helpful. The step-by-step instructions and troubleshooting tips gave me the confidence to try decoupage. My upcycled lamp base looks professional."
Mark D. · Chicago, IL
★★★★★
"I used to think decoupage was just for old-fashioned crafts, but this showed me the modern potential. I transformed a plain IKEA cabinet with vintage botanical prints, and the result is stunning – looks like a designer piece!"
Emily R. · Portland, OR
★★★★★
"The depth of information here is great, especially the history. I found the section on troubleshooting very practical, though I still had a few minor bubbles on my first attempt. Practice makes perfect, I suppose!"
David L. · Miami, FL
★★★★★
"My kids and I used this guide to decoupage some old shoeboxes for toy storage. It was a fantastic, mess-friendly activity, and they loved customizing their own boxes. A wonderful family craft!"
Chloe S. · Denver, CO
Frequently Asked Questions
What is the best type of paper to use for decoupage?
The best type of paper depends on your desired effect. Thin papers like decorative napkins, tissue paper, or specialized decoupage papers blend most seamlessly. Thicker papers like magazine clippings or printouts work well but might show slightly more texture. Always test a small piece first to see how it reacts with your chosen medium.
Is decoupage difficult for beginners?
Not at all! Decoupage is widely considered one of the most accessible and forgiving crafts for beginners. While it requires patience for drying times and careful smoothing, the basic steps are simple to master, and there's plenty of room for creative expression even with minimal experience.
How do I prevent wrinkles and bubbles in my decoupage projects?
To prevent wrinkles and bubbles, apply a thin, even layer of decoupage medium to your surface, carefully place your cutout, and then immediately smooth it out from the center to the edges using a soft brush, brayer, or plastic squeegee. Ensure each layer of medium dries completely before adding the next.
Is decoupage an expensive craft to start?
Decoupage can be a very inexpensive craft to start. You can often use items you already have, like old magazines, fabric scraps, or discarded furniture. Basic supplies like decoupage medium, brushes, and scissors are relatively affordable, making it a great budget-friendly hobby.
How does decoupage differ from collage?
While both involve adhering paper to a surface, decoupage focuses on creating a seamless, lacquered finish where the paper appears integrated into the object, often through many layers of sealant. Collage, on the other hand, typically embraces the distinct edges and textures of the glued elements, often with less emphasis on a perfectly smooth, protective topcoat.
Who should try decoupage?
Decoupage is perfect for anyone looking for a creative outlet, from beginners to experienced crafters. It's ideal for those who enjoy upcycling, personalizing home decor, making unique gifts, or simply want a relaxing and rewarding artistic pursuit that doesn't require drawing or painting skills.
Is decoupage safe for children?
Yes, decoupage can be a safe and fun activity for children with adult supervision. Ensure you use non-toxic, child-safe decoupage mediums and adhesives. Provide blunt-tipped scissors for younger children and supervise the use of craft knives for older kids to ensure safety.
What are the emerging trends in decoupage craft?
Emerging trends in decoupage include incorporating mixed media elements like glitter, metallic foils, and textured pastes, using digital prints of personal photos, and focusing on sustainable crafting by upcycling vintage items. There's also a trend towards minimalist designs and bold, graphic patterns.
Now that you understand what is decoupage craft and its endless possibilities, it's time to unleash your inner artist. Gather your materials, choose your first project, and transform the ordinary into the extraordinary. Dive into the delightful world of decoupage today and create something truly unique!

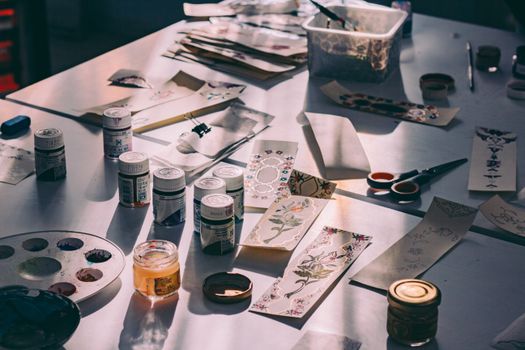 Photo: Sedanur Kunuk / Pexels
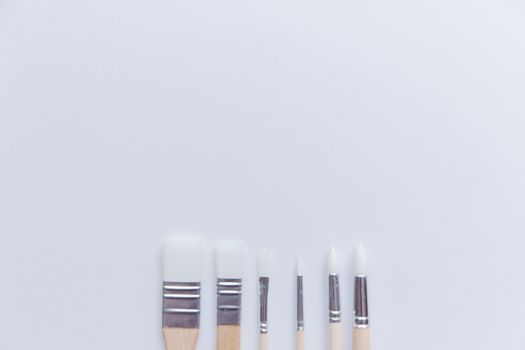 Photo: PNW Production / Pexels
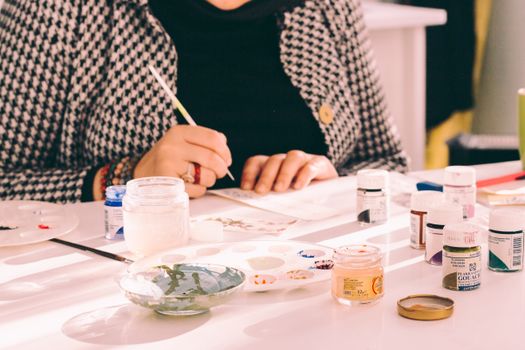 Photo: Sedanur Kunuk / Pexels