Mastering Craft Paper for Card Making: Your Ultimate Guide
craft paper for card making

Mastering Craft Paper for Card Making: Your Ultimate Guide

Discover the ideal papers to elevate your handmade cards from simple to spectacular, ensuring every creation shines.

Start Crafting Now

Key Takeaways

  • ✓ Cardstock weight is crucial for durability and structure in card making.
  • ✓ Specialty papers like vellum or glitter add unique textures and visual interest.
  • ✓ Acid-free paper ensures your handmade cards last longer without yellowing.
  • ✓ Understanding paper grain can prevent cracking when folding or scoring.

How It Works

1
Select Your Base

Choose a sturdy cardstock (65lb to 110lb) for your card base. This provides the essential structure and durability for your design.

2
Layer and Decorate

Incorporate decorative papers, patterned sheets, or specialty papers for layers and embellishments. Mix and match textures and colors to create visual depth.

3
Add Details

Utilize smaller pieces of craft paper for die-cuts, sentiments, or focal points. Precision cutting and adhesive choices are key for a professional finish.

4
Finish and Preserve

Ensure all elements are securely attached and consider archival-safe glues. Store finished cards properly to maintain their quality and prevent damage.

The Foundation: Understanding Cardstock for Card Making
Artistic composition of overlapping peach-colored cards on a matching background. Photo: Diana Light / Pexels
When embarking on the delightful journey of creating handmade cards, the very first and arguably most critical decision you'll make revolves around your choice of craft paper for card making, specifically the cardstock. Cardstock is the backbone of your card; it provides the structure, weight, and initial impression. But what exactly makes one cardstock better than another for this purpose? It primarily comes down to weight, finish, and composition. Cardstock weight is measured in pounds (lb) in the US and grams per square meter (GSM) in other regions. For card making, a good starting point is usually 65lb (176 GSM) for lighter cards or layers, and 80lb (216 GSM) to 110lb (298 GSM) for sturdy card bases. An 80lb cardstock offers a good balance of durability and flexibility, making it easy to fold and work with, while still feeling substantial. For cards that need to stand up on their own or endure more handling, 100lb or 110lb cardstock is ideal. This heavier weight prevents your card from feeling flimsy and gives it a professional, high-quality feel. Beyond weight, the finish of your cardstock plays a significant role. Common finishes include smooth, textured, linen, and metallic. Smooth cardstock is excellent for stamping, printing, and achieving crisp lines, as it allows ink to sit evenly on the surface. Textured cardstock, on the other hand, adds a tactile dimension and visual interest, perfect for backgrounds or when you want to create a more rustic or elegant look. Linen cardstock mimics the subtle weave of linen fabric, offering a sophisticated touch. Metallic cardstock, with its subtle shimmer, is perfect for adding a touch of glamour and luxury to special occasion cards. Composition is another factor often overlooked. Acid-free cardstock is paramount for archival quality. Over time, acids in paper can cause it to yellow and become brittle. Using acid-free paper ensures your beautiful handmade cards will last for years, becoming cherished keepsakes rather than fading memories. This is especially important for cards you expect to be stored or displayed. Furthermore, consider the grain of the paper. Paper has a grain direction, meaning the fibers align predominantly in one direction. Folding against the grain can lead to cracking, especially on heavier cardstock. To find the grain, gently try to bend a corner of the paper in both directions; it will bend more easily with the grain. Scoring your cardstock before folding is also a best practice, creating a clean, crisp fold regardless of grain direction. By paying attention to these foundational elements of cardstock, you lay the groundwork for stunning and durable handmade cards that truly reflect your creative vision. The right base is the first step to a masterpiece. Crafting with the right foundation makes all the difference.

Elevating Designs with Specialty Craft Papers

Colorful DIY craft session featuring glitter confetti and paper crafts indoors. Photo: cottonbro studio / Pexels
Once you've mastered the art of choosing your cardstock base, the next exciting frontier in craft paper for card making is exploring specialty papers. These are the elements that transform a simple card into a work of art, adding texture, shimmer, and unique visual appeal. Specialty papers encompass a vast array of options, each bringing its own character to your creations. Vellum, for instance, is a semi-translucent paper that offers a delicate, ethereal quality. It's fantastic for creating soft overlays, windows, or adding a subtle layer of text without completely obscuring what's beneath. Vellum can be stamped, heat embossed, or printed on, though it requires specific adhesives that won't show through. Its subtle elegance is perfect for wedding invitations or sophisticated thank you notes. Glitter paper is another popular choice, instantly adding sparkle and festivity. Available in various colors and glitter sizes, it can be used for die-cuts, borders, or as an accent layer. When working with glitter paper, be mindful of shedding; some brands are better than others at keeping the glitter firmly attached. It's ideal for birthday cards, holiday greetings, or any occasion that calls for a bit of dazzle. Foil paper, with its reflective, mirror-like surface, brings undeniable glamour. Whether in gold, silver, rose gold, or vibrant colors, foil paper creates a luxurious statement. It's often used for intricate die-cuts or as a striking background layer. Its smooth, non-porous surface can be a bit tricky with adhesives, so opt for strong, quick-drying options. Patterned paper, often sold in pads or individual sheets, is a staple for card makers. These papers feature an endless variety of designs, from florals and geometrics to seasonal themes and whimsical illustrations. They are perfect for creating focal points, background layers, or coordinated embellishments. When selecting patterned paper, consider the scale of the pattern in relation to your card size and the overall aesthetic you want to achieve. Mixing and matching complementary patterns can add incredible depth and interest to your card. Textured papers, beyond linen cardstock, include options like felt paper, cork paper, or even papers embedded with natural fibers. These add a rich, tactile experience to your cards, inviting the recipient to touch and explore. They are excellent for creating organic, rustic, or cozy themes. Finally, don't forget about handmade papers. These often feature unique inclusions like petals, threads, or deckled edges, offering an unparalleled artisanal feel. While they can be more delicate and sometimes harder to cut precisely, their distinctive beauty makes them perfect for very special, one-of-a-kind cards. Incorporating specialty papers requires a thoughtful approach. Consider how different textures and finishes will interact and contribute to the overall message and aesthetic of your card. Experimentation is key to discovering your favorite combinations and techniques, pushing the boundaries of your card making designs.

Techniques and Tools for Working with Craft Paper for Card Making
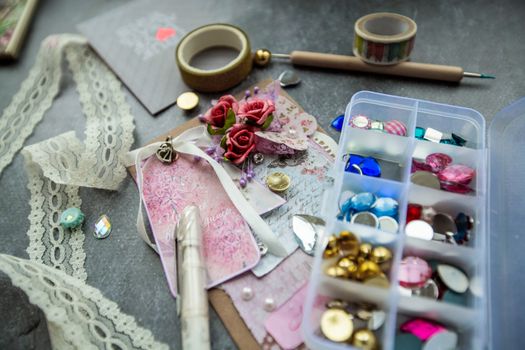
From above box of various colorful fancy stones with lace and adhesive tapes placed on table near handmade greeting card decorated with artificial flowers Photo: Victoria Emerson / Pexels
Mastering the selection of craft paper for card making is only half the battle; knowing how to work with these materials effectively is where your true artistry shines. A range of techniques and specialized tools can elevate your card making from good to exceptional, ensuring clean cuts, perfect folds, and secure embellishments. One of the most fundamental techniques is scoring. As mentioned earlier, scoring creates a crease in paper before folding, resulting in a crisp, professional fold that prevents cracking, especially on heavier cardstock or papers with a delicate finish. A scoring board with a bone folder is an invaluable tool for this. Simply align your paper, use the bone folder to create a score line along the desired fold, and then fold gently. This small step makes a huge difference in the finished look of your card. Cutting is another critical aspect. While scissors are fine for general use, a paper trimmer or guillotine cutter ensures straight, precise cuts, which are essential for professional-looking layers and card bases. For intricate designs, a craft knife with a self-healing mat or a die-cutting machine is indispensable. Die-cutting machines, whether manual or electronic, allow you to cut complex shapes, sentiments, and even embossed textures from various types of paper, opening up a world of design possibilities. Adhesive choice is paramount. The wrong adhesive can warp your paper, leave unsightly bumps, or fail to hold elements securely. For general paper-to-paper adhesion, dry adhesives like tape runners or glue dots are excellent, as they don't add moisture that can cause warping. Liquid glues, such as craft glue or tacky glue, are stronger and offer more repositioning time, but should be used sparingly and allowed to dry completely. For specialty papers like vellum or foil, specific adhesives designed for those materials are often recommended to prevent visible marks or peeling. For dimensional elements, foam adhesive dots or tape add height and shadow, creating visual interest. Embossing, both dry and wet, adds texture and dimension. Dry embossing uses a stylus and a stencil or an embossing folder with a die-cutting machine to raise a design from the paper's surface. Wet embossing involves stamping an image with a slow-drying ink, sprinkling it with embossing powder, and then heating it with a heat gun to melt the powder into a raised, glossy finish. Both techniques transform flat paper into something tactile and visually striking. Stamping is a classic card making technique that allows for endless customization. Choosing the right ink for your paper type is crucial. Dye inks dry quickly and are good for general stamping, while pigment inks are opaque and slower drying, ideal for embossing. Archival inks ensure your stamped images last. Layering is at the heart of many card designs. Experiment with different sizes, colors, and textures of paper to create depth and visual hierarchy. Matting (placing a smaller piece of paper on a slightly larger piece of a contrasting color) is a simple yet effective way to make elements pop. By combining these techniques and utilizing the right tools, you can unleash the full potential of your craft paper for card making, turning your creative ideas into beautifully executed, personalized cards. Practice and patience are your best allies in mastering these skills.

Common Mistakes and Expert Tips for Craft Paper Selection
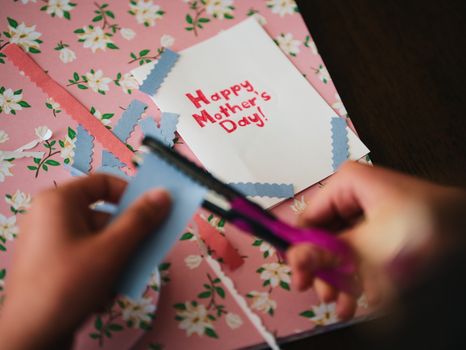
Creative Mother's Day card crafting with floral paper and scissors Photo: Aaron Burden / Pexels
Even experienced crafters can sometimes stumble when it comes to paper selection. Avoiding common pitfalls and incorporating expert tips can drastically improve the quality and longevity of your handmade cards. Common Mistakes to Avoid: * **Choosing the Wrong Weight:** Using paper that's too thin for a card base results in a flimsy, unprofessional card. Conversely, using overly thick paper for layers can make the card bulky and difficult to fold or adhere. * **Ignoring Paper Grain:** Folding against the grain causes unsightly cracks, especially on darker or heavier cardstock. Always score and fold with the grain for a clean crease. * **Incompatible Adhesives:** Using wet glue on thin paper can cause warping or bubbling. Using a weak adhesive on heavy or textured paper can lead to elements detaching over time. Match your adhesive to your paper type and project. * **Overlooking Acid-Free Quality:** If you want your cards to last as keepsakes, using non-acid-free paper means they will yellow and degrade over time. Always check for 'acid-free' or 'archival' labels. * **Clashing Patterns/Colors:** While experimenting is good, too many conflicting patterns or colors can make a card look cluttered and unharmonious. Strive for balance and a cohesive color palette. * **Not Testing Materials:** Before committing to a full card, test how ink stamps, how glue adheres, or how a die-cut performs on a small scrap of your chosen paper. This saves time and materials. Expert Tips for Craft Paper Selection: * **Build a Core Stash:** Invest in high-quality, acid-free cardstock in white, cream, and black in various weights (80lb and 110lb). These are your workhorses. * **Curate Color Palettes:** Instead of buying individual sheets, look for paper pads or collections that are designed to work together. This takes the guesswork out of color coordination. * **Think About the Recipient:** Consider who the card is for and the occasion. A child's birthday card might benefit from bright, glittery paper, while a sympathy card calls for subtle, textured cardstock. * **Embrace Texture:** Don't shy away from textured papers. They add a luxurious feel and visual interest without needing complex embellishments. * **Utilize Scraps:** Keep a scrap bin! Small pieces of specialty paper are perfect for tiny die-cuts, sentiments, or adding a pop of color/texture to a small area. * **Read Product Descriptions:** Pay attention to paper finishes, weights, and whether it's suitable for printing, stamping, or die-cutting. This prevents disappointment. * **Consider the Envelope:** Will your chosen paper make the card too bulky or heavy for standard mailing? Factor in postage costs and envelope size. * **Invest in a Good Paper Trimmer:** Precision is key in card making. A sharp, accurate paper trimmer is worth its weight in gold for clean edges and consistent sizing. By being mindful of these common mistakes and incorporating these expert tips, you'll find yourself selecting and working with craft paper for card making with greater confidence and producing truly exceptional results. Your cards will not only look professional but will also be cherished for years to come.

Comparison

FeatureCardstock (80-110lb)Patterned PaperVellumGlitter Paper
Primary UseCard Base, LayersDecorative Layers, BackgroundsOverlays, Soft DetailsAccents, Festive Designs
Weight RangeHeavy (216-298 GSM)Medium (120-180 GSM)Light (90-110 GSM)Medium-Heavy (180-250 GSM)
Texture/FinishSmooth, Linen, TexturedVarious (Matte, Glossy)Translucent, SmoothRough (Glitter coated)
PrintabilityExcellentGood (depending on finish)Fair (special ink needed)Poor
DurabilityHighMediumMedium (can tear easily)Medium-High
Adhesive NeedsStandardStandardSpecial (non-showing)Strong, quick-dry
Best ForStructural integrityVisual interest, themesElegance, subtle layersSparkle, celebration

What Readers Say

"I used to struggle with flimsy cards, but after investing in quality 110lb craft paper for card making, my projects look so professional. The difference in feel and durability is incredible, and my friends always comment on the quality."

Sarah P. · Austin, TX

"This guide completely changed how I approach my paper choices. Learning about acid-free paper and grain direction made a huge impact. My holiday cards last much longer now without any yellowing."

Mark T. · Seattle, WA

"I was hesitant to try specialty papers, but the suggestions for vellum and glitter paper totally elevated my wedding invitation designs. The cards went from nice to absolutely stunning, receiving so many compliments."

Jessica L. · Miami, FL

"The information on different cardstock weights was incredibly helpful, though I still find it a bit tricky to choose the absolute perfect weight for every single project. Still, a vast improvement in my card making."

David R. · Denver, CO

"As a beginner, this article was a lifesaver! It demystified all the different craft paper types for card making and even gave great tips on tools. My first few cards already look so much better than I expected."

Emily K. · Chicago, IL

Frequently Asked Questions

What is the best weight of craft paper for card making bases?

For sturdy card bases that hold their shape well and feel substantial, 80lb (216 GSM) to 110lb (298 GSM) cardstock is generally recommended. 80lb offers a good balance of flexibility and strength, while 100lb or 110lb provides maximum durability for standing cards or those with many layers.

Will my handmade cards yellow over time if I don't use special paper?

Yes, if you use paper that is not acid-free, it will likely yellow and become brittle over time due to the natural degradation of wood pulp and other materials. For cards intended to be keepsakes, always choose acid-free or archival quality craft paper for card making to ensure longevity.

How do I prevent my paper from cracking when I fold it for a card?

To prevent cracking, always score your paper before folding, especially on heavier cardstock. Scoring creates a channel for the fold, allowing the fibers to bend cleanly. Additionally, try to fold with the paper's grain for the smoothest result.

Is more expensive craft paper always better for card making?

Not necessarily. While higher-quality paper often comes with a higher price tag (e.g., acid-free, specialty finishes), the 'best' paper depends on your specific project needs. For simple, high-volume cards, a mid-range cardstock might be perfect. For heirloom quality or intricate designs, investing in premium paper is worthwhile. Balance cost with desired outcome.

What's the difference between cardstock and regular printer paper for card making?

The main difference is weight and thickness. Cardstock is significantly heavier and thicker than standard printer paper (which is typically 20-28lb). This added weight gives cards structure, durability, and a professional feel, whereas printer paper would be too flimsy for a card base.

Who should use specialty craft paper in their card making?

Anyone looking to add unique textures, visual interest, or a touch of luxury to their handmade cards should explore specialty craft papers. They are perfect for crafters who want to elevate their designs beyond basic cardstock and create truly memorable, custom pieces for any occasion.

Are there any safety concerns with glitter paper or metallic papers?

Generally, craft-grade glitter and metallic papers are safe for adult use. However, some glitter papers can shed loose glitter, which should be kept away from eyes or open wounds. Always ensure proper ventilation if using sprays or adhesives with these materials, and supervise children if they are crafting with them.

What are the emerging trends in craft paper for card making?

Emerging trends include sustainable and recycled papers, papers with unique natural textures (like cork or wood veneer), and an increased focus on subtle, sophisticated metallic or iridescent finishes. Digital integration, such as papers optimized for digital printing, is also growing, alongside papers designed for mixed media techniques.

Selecting the right craft paper for card making is the first step to unlocking endless creative possibilities. By understanding paper types, weights, and finishes, you can transform your handmade cards into cherished works of art. Dive in, experiment, and let your creativity flourish with the perfect paper choices.

Topics: craft paper for card makingcardstock for cardshandmade card paperpaper crafting suppliescard making techniques
Leo List
Brampton weed
Adultwork EstrelaBet Vai de Bet R7 Bet Betão Galera Bet Rainbet Bet9ja Shop SportyBet BetKing Sisal Loto Foot Hollywoodbets YesPlay Odibets RushBet Jugabet BetWarrior BetCity MSport betPawa Fortebet