✓ Decoupage is the art of decorating objects by gluing colored paper cutouts onto them in combination with special paint effects, gold leaf, and other decorative elements.
✓ The word 'decoupage' comes from the French word 'découper,' meaning 'to cut out.'
✓ It dates back to the 17th century, originating in Venice, Italy, as an imitation of oriental lacquerware.
✓ Nearly any surface can be decoupaged, including wood, metal, glass, ceramic, and fabric.
✓ The process involves cutting, gluing, and sealing with multiple layers of varnish to create a smooth, durable finish.
How It Works
1
Prepare Your Surface & Materials
Clean and prime your chosen object (e.g., a wooden box, glass bottle). Select your paper cutouts, such as napkins, special decoupage papers, or magazine images, and gather your adhesive and sealant.
2
Cut & Arrange Your Designs
Carefully cut out your paper images. Experiment with different arrangements on your surface before applying glue to visualize the final design and ensure proper fit and aesthetic appeal.
3
Glue & Smooth Your Cutouts
Apply a thin layer of decoupage medium to the back of each cutout and precisely position it on your object. Gently smooth out any wrinkles or air bubbles using a soft brush or your fingers, working from the center outwards.
4
Seal & Finish with Varnish
Once all cutouts are adhered and dry, apply multiple thin layers of decoupage sealant or varnish over the entire surface, allowing each layer to dry completely. This creates a durable, protective, and often glossy finish, mimicking painted effects.
Unveiling the Timeless Art: What Exactly is Decoupage Craft?
Photo: Jill Wellington / Pexels
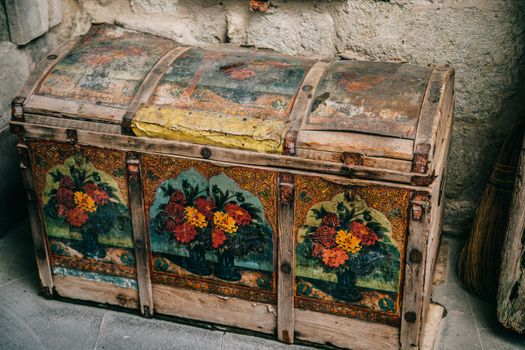
At its heart, decoupage is a captivating and accessible craft that transforms ordinary items into personalized works of art through the simple yet effective technique of cutting, pasting, and varnishing. The term itself, derived from the French word 'découper' meaning 'to cut out,' perfectly encapsulates the core action involved. Imagine taking beautiful paper images – perhaps from magazines, specialized decoupage papers, napkins, or even your own printed photos – meticulously cutting them out, and then adhering them onto a chosen surface. The magic happens when these seemingly disparate elements are brought together and sealed under multiple layers of varnish, creating a smooth, integrated finish that makes the cutouts appear as if they were painted directly onto the object. This layering of varnish is crucial; it not only protects the artwork but also gives it a depth and durability that belies its paper origins, often resulting in a glossy, porcelain-like appearance.
Decoupage isn't just about sticking paper down; it's an intricate dance of composition, texture, and patience. Artists often employ various techniques to enhance their pieces, such as sanding between varnish layers to achieve an ultra-smooth finish, adding crackle effects for an antique look, or incorporating paint and other embellishments to blend the paper designs seamlessly with the base. The beauty of decoupage lies in its incredible versatility. Almost any surface can be decoupaged, from wooden furniture and glass bottles to metal tins, ceramic plates, and even fabric items like canvas bags. This adaptability makes it an ideal craft for upcycling, breathing new life into old, forgotten objects and turning them into unique decorative pieces or thoughtful gifts. It's a craft that invites experimentation, allowing you to combine different paper styles, colors, and textures to tell a visual story or simply create a beautiful pattern. Whether you're aiming for a shabby chic aesthetic, a vintage vibe, a modern geometric design, or a whimsical narrative, decoupage provides the tools to bring your vision to life. It’s a craft that rewards attention to detail and offers immense satisfaction as you watch your chosen object undergo a stunning transformation, becoming a testament to your creativity and skill.
A Journey Through Time: The Rich History and Evolution of Decoupage
Photo: hello aesthe / Pexels
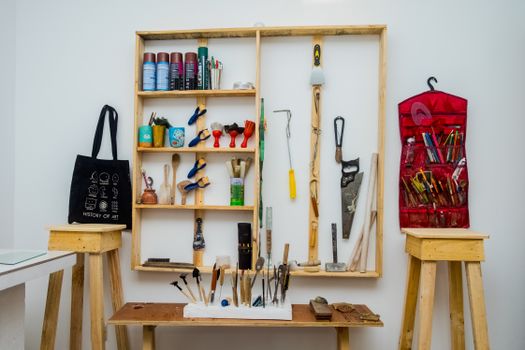
The origins of decoupage are far more ancient and global than many might initially assume, extending beyond its popular 17th-century European resurgence. The practice of cutting out images and applying them to surfaces can be traced back to Siberian tomb art from the 12th century, where felt cutouts were used to decorate burial sites. However, the craft truly gained prominence and refinement in the 17th century in Venice, Italy. Venetian artisans, eager to replicate the highly sought-after and expensive lacquered furniture imported from the Far East, developed a clever and more affordable alternative. They began to cut out intricate prints, often depicting pastoral scenes, flora, and fauna, and adhered them to furniture. These cutouts were then covered with many layers of a clear lacquer, painstakingly sanded and polished, to achieve a smooth, deep, and glossy finish that mimicked the look of Oriental lacquerware. This Venetian technique, known as 'arte povera' or 'poor man's art,' allowed the less affluent to own beautiful, decorative pieces that rivaled the luxury goods of the aristocracy.
From Venice, decoupage spread across Europe, captivating the royal courts and nobility. French courts, in particular, embraced the art form, and it was here that the term 'decoupage' was coined. Famous figures like Madame de Pompadour, mistress of King Louis XV, were avid decoupage enthusiasts, spending hours on their own projects. The craft continued to evolve through the 18th and 19th centuries, adapting to changing artistic styles and available materials. The Victorian era saw a resurgence of decoupage, especially among women, who used it to decorate screens, hatboxes, and various household items with sentimental images, often from popular prints and scrapbooking materials. The advent of mass-produced prints and better adhesives made the craft more accessible to the general public. In the 20th century, decoupage experienced periodic revivals, particularly in the mid-century with the rise of DIY culture and the availability of new materials like Mod Podge, a popular all-in-one glue, sealer, and finish. Today, decoupage continues to thrive, appealing to crafters of all ages who appreciate its blend of historical charm, artistic expression, and the satisfaction of transforming the mundane into the magnificent. Its enduring appeal lies in its ability to combine artistic flair with practical application, making it a truly timeless art form.
Essential Tools and Materials: Starting Your Decoupage Journey
Photo: Sedanur Kunuk / Pexels
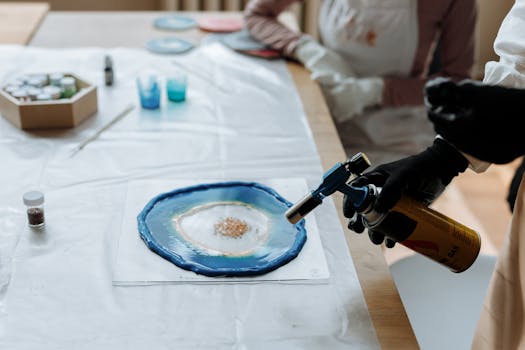
Embarking on a decoupage project is surprisingly straightforward, requiring only a handful of essential tools and materials that are readily available. Understanding what you need and why each item is important will set you up for success and ensure a smooth, enjoyable crafting experience. The foundation of any decoupage project is, of course, the paper you choose. This can range from specialized decoupage papers, which are typically thin and designed for easy adherence, to decorative napkins with beautiful patterns, magazine cutouts, old book pages, printed images, or even fabric scraps. The key is to select paper that is not too thick, as thinner paper blends more seamlessly into the surface and reduces the likelihood of visible edges. Experimenting with different types of paper is part of the fun, allowing you to discover unique textures and visual effects. Next, you'll need a suitable adhesive and sealant. The most popular choice for beginners and experienced crafters alike is decoupage medium, such as Mod Podge. This versatile product acts as both a glue to adhere your cutouts and a sealer to protect them, often available in various finishes like gloss, matte, or satin. Its all-in-one nature simplifies the process considerably. However, you can also use white PVA glue (like Elmer's Glue) diluted with a little water, followed by a separate varnish or sealant.
Beyond paper and adhesive, a good pair of sharp scissors or a craft knife is indispensable for precise cutting. The cleaner the cut, the more professional your finished piece will look. For smoothing out bubbles and wrinkles after applying your cutouts, a soft-bristled brush, a brayer, or even a credit card can be incredibly helpful. You'll also need a few brushes: one for applying the adhesive/medium and another for applying the final sealant layers. Synthetic brushes are often preferred as they clean up easily and don't shed bristles. Finally, a crucial, though often overlooked, material is your chosen surface. As mentioned, the possibilities are vast: wooden boxes, picture frames, ceramic tiles, glass bottles, metal trays, old furniture, or even canvas. Ensure your surface is clean, dry, and sometimes primed or painted, depending on the desired base color and material. A coat of gesso or acrylic paint can provide a uniform background that makes your decoupaged images pop. Don't forget sandpaper – fine-grit sandpaper is excellent for smoothing edges and between varnish layers for a truly professional finish. With these basic supplies, you're well-equipped to dive into the delightful world of decoupage and start transforming your ideas into tangible, beautiful creations. For more in-depth guidance on specific tools and techniques, consider exploring advanced craft tutorials.
Mastering the Art: Tips, Techniques, and Common Pitfalls to Avoid
Photo: Jill Wellington / Pexels
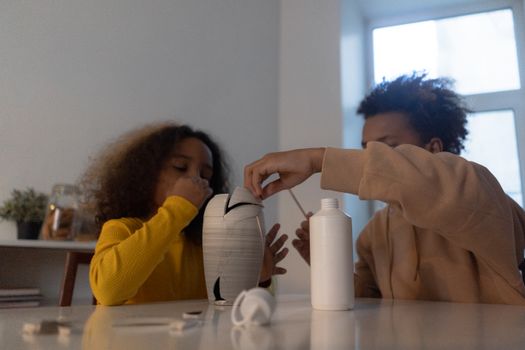
Achieving professional-looking decoupage results requires a blend of patience, precision, and understanding a few key techniques. One of the most important tips is to always prepare your surface thoroughly. Whether it's sanding wood, cleaning glass, or priming metal, a clean, smooth, and sometimes painted base provides the best canvas for your paper. When cutting out images, take your time. Precision cutting, especially around intricate details, makes a significant difference in the final appearance, helping the cutouts blend seamlessly. If working with very thin paper, like napkins, separating the ply layers (most napkins have 2-3 layers) and using only the top printed layer will make it easier to adhere and reduce bulk.
When applying the decoupage medium, use thin, even coats. Too much glue can saturate the paper, causing wrinkles and tearing, especially with delicate materials. After positioning your cutout, gently smooth it from the center outwards to eliminate air bubbles and wrinkles. A soft brush, a brayer, or even your fingers can be used for this. If wrinkles persist, sometimes a small slit with a craft knife can help release trapped air, then re-smooth. Allow each layer of glue and especially each layer of sealant to dry completely before applying the next. This prevents stickiness, smudging, and ensures a durable, clear finish. For a truly professional, painted-on look, consider sanding lightly with very fine-grit sandpaper (e.g., 400-600 grit) between the final layers of varnish. This removes any tiny imperfections and helps to integrate the paper into the surface, creating an incredibly smooth, almost glass-like finish.
Common pitfalls include:
* **Visible Brush Strokes:** Use a soft brush and apply varnish in one direction, avoiding overworking the surface.
* **Bubbles and Wrinkles:** Take your time smoothing and ensure thin, even coats of glue.
* **Paper Tearing:** Be gentle, especially with delicate papers. Use a softer brush for application.
* **Cloudy Finish:** Ensure all layers are completely dry, and apply thin coats of sealant. Humidity can also affect drying.
* **Sticky Finish:** This usually means the layers weren't fully dry, or too much medium was applied.
By heeding these tips and being mindful of common mistakes, your decoupage projects will not only be beautiful but also durable and long-lasting, showcasing your artistic talent.
Comparison
Feature
Decoupage Medium (e.g., Mod Podge)
White PVA Glue (Diluted)
Spray Adhesive
Function
Glue, Sealer, Finish
Glue Only (needs separate sealant)
Temporary or Permanent Glue
Ease of Use
Very Easy (all-in-one)
Easy (two-step process)
Moderate (can be messy)
Finish Options
Gloss, Matte, Satin, Outdoor
Matte (glue only), varies with sealant
Matte
Durability
High (with multiple coats)
Moderate (depends on sealant)
Low to Moderate
Best For
All decoupage projects, beginners
Budget-friendly, large areas
Temporary placement, lightweight papers
Wrinkle Control
Good
Good
Poor (can cause wrinkles)
Water Resistance
✓ (some formulas)
✗ (unless sealed)
✗
What Readers Say
★★★★★
"I always wondered what is decoupage craft, and this guide truly opened my eyes! I transformed an old wooden chest into a stunning piece of art for my living room. The step-by-step instructions were incredibly clear, and I love the personalized touch it adds."
Sarah J. · Austin, TX
★★★★★
"As a beginner, I was intimidated, but learning what is decoupage craft from this article made it so accessible. I decoupaged some ceramic coasters, and they look professionally made. I'm already planning my next project!"
Mark D. · Seattle, WA
★★★★★
"This resource is fantastic for anyone curious about what is decoupage craft. I followed the tips for avoiding bubbles and achieved a perfectly smooth finish on a glass vase. It's now a beautiful centerpiece in my kitchen."
Emily R. · Miami, FL
★★★★★
"I've been dabbling in crafts for years, and while I knew what is decoupage craft, this article offered some really valuable historical context and advanced tips. The comparison table for adhesives was particularly helpful, guiding me to try a new sealant that gave a better finish."
Chris P. · Denver, CO
★★★★★
"I used the decoupage craft techniques from this guide to upcycle some old furniture for my daughter's dorm room. The results are amazing – durable, stylish, and exactly what she wanted. It was a fun and rewarding project."
Linda M. · Boston, MA
Frequently Asked Questions
What is the best type of paper to use for decoupage?
The best type of paper for decoupage is typically thin, non-glossy paper that won't show texture through the finished layers. Specialized decoupage papers, decorative napkins (using only the top printed ply), gift wrap, magazine pages, or even printed laser copies work very well. Avoid very thick cardstock or heavily textured papers as they are harder to smooth and blend.
Will decoupage make my items waterproof or dishwasher safe?
Generally, standard decoupage mediums do not make items fully waterproof or dishwasher safe. While they offer good water resistance, prolonged exposure to water or harsh detergents can damage the finish. For items that need to be more durable or used outdoors, look for specific outdoor or dishwasher-safe decoupage mediums and sealants, and always hand wash gently.
How do I prevent wrinkles and bubbles when decoupaging?
To prevent wrinkles and bubbles, apply thin, even coats of decoupage medium. Position your paper carefully, then gently smooth it from the center outwards using a soft brush, a brayer, or your fingers. For very thin papers, applying a thin layer of medium to the surface first, then placing the paper, and finally applying another thin layer over the top can help. Patience and thorough smoothing are key.
Is decoupage an expensive craft to start?
No, decoupage is generally a very affordable craft to start. You can often use materials you already have, like old magazines, fabric scraps, or discarded items to decorate. The main investments would be a good decoupage medium (like Mod Podge), a pair of scissors, and some brushes, all of which are relatively inexpensive and last for many projects.
How does decoupage compare to scrapbooking?
While both crafts involve paper and adhesive, decoupage focuses on decorating three-dimensional objects or flat surfaces to create a seamless, varnished finish, making the paper appear painted on. Scrapbooking, on the other hand, is primarily about preserving memories and telling stories in a book format, often with an emphasis on layering, embellishments, and journaling, without the extensive sealing process of decoupage.
Who should consider trying decoupage craft?
Decoupage craft is perfect for anyone who enjoys creative expression, upcycling, or adding a personal touch to their home decor. It's suitable for beginners due to its forgiving nature and simple techniques, but also offers endless possibilities for experienced crafters to explore complex designs and finishes. If you love working with paper and transforming objects, decoupage is for you!
Are there any safety concerns with decoupage materials?
Most modern decoupage mediums and glues are non-toxic and water-based, making them safe for general use. However, always check product labels for specific safety instructions. Ensure good ventilation when using spray sealants or oil-based varnishes. Keep materials out of reach of small children and pets, and wash hands thoroughly after crafting.
What are the emerging trends in decoupage craft?
Emerging trends in decoupage include incorporating mixed media elements like textured pastes, metallic foils, and stenciling for added dimension. There's also a growing interest in using digital prints and personal photographs for highly personalized projects, and a focus on sustainable crafting by upcycling and repurposing everyday items into unique, artistic pieces.
Now that you have a comprehensive understanding of what is decoupage craft, its rich history, essential tools, and techniques, you're ready to embark on your own creative journey. Grab your supplies, find an object waiting for a new life, and let the magic of cutting and pasting transform it into something truly extraordinary. Unleash your inner artist with decoupage today!