✓ Decoupage originates from the French word 'découper,' meaning 'to cut out.'
✓ It involves cutting out images, gluing them to a surface, and then sealing them with layers of varnish.
✓ This craft can be applied to almost any surface, including wood, metal, glass, and fabric.
✓ The art form dates back to the 17th century, with roots in Siberia and China, later popularized in Europe.
How It Works
1
Select Your Surface & Images
Choose an item to decorate (e.g., a box, vase, furniture) and gather paper images you wish to use. The surface should be clean and dry, and images can be from magazines, printed papers, or special decoupage papers.
2
Cut & Arrange Images
Carefully cut out your chosen images with precision, ensuring clean edges. Experiment with different arrangements on your surface before gluing to finalize your design composition.
3
Glue Images in Place
Apply a thin, even layer of decoupage medium (glue) to the back of each image and adhere it smoothly to your surface. Gently press out any air bubbles or wrinkles from the center outwards.
4
Seal with Varnish Layers
Once the glue is completely dry, apply multiple thin coats of decoupage varnish or sealant over the entire surface, allowing each coat to dry thoroughly. This protects the design and creates a smooth, durable finish.
The Ancient Art of Decoupage: A Rich History and Modern Revival
Photo: betül nur akyürek / Pexels
To truly understand what is decoupage craft, we must first delve into its fascinating history, a journey that spans continents and centuries. The word 'decoupage' itself is French, meaning 'to cut out,' but the practice of decorating objects with cut-out paper images predates its European popularization by hundreds of years. Evidence suggests early forms of cut-paper decoration existed in Siberia as far back as the 12th century, adorning funerary objects. This technique then traveled eastward, finding a significant home in China during the 11th and 12th centuries, where intricate cut-outs were used to decorate lanterns, windows, and gift boxes.
It was in 17th century Venice, Italy, that decoupage truly began its ascent into the European art scene. Venetian artisans, seeking to mimic expensive inlaid furniture from the Far East, began using cut-out prints, often by famous artists like Boucher and Watteau, to adorn furniture pieces. They would apply numerous layers of lacquer to these surfaces, sanding between each coat, to create a smooth, almost painted-on effect. This 'poor man's lacquer' became incredibly fashionable, particularly among the wealthy who commissioned elaborate pieces. The popularity of decoupage then spread to France and England, where it was embraced by figures like Madame de Pompadour and Queen Victoria, becoming a sophisticated pastime for ladies of leisure. The meticulous detail and endless layers of varnish became a hallmark of this era.
In the 20th century, decoupage experienced several revivals. The Arts and Crafts movement, with its emphasis on handmade items and decorative arts, saw a resurgence of interest. Later, in the mid-century, a simpler, more accessible form of decoupage emerged, fueled by readily available craft glues and decorative papers. Today, what is decoupage craft is more popular than ever, thanks to the accessibility of materials, online tutorials, and a renewed appreciation for personalized, upcycled items. It’s no longer confined to imitating expensive finishes but has evolved into a versatile and expressive art form. From intricate, multi-layered masterpieces to simple, charming embellishments, decoupage continues to captivate crafters worldwide, offering a therapeutic outlet for creativity and a way to transform the ordinary into the extraordinary. Understanding this rich lineage helps us appreciate the depth and potential of this enduring craft.
Essential Tools and Materials: Building Your Decoupage Toolkit
Photo: Em Hopper / Pexels
Embarking on your decoupage journey requires a basic understanding of the tools and materials that will facilitate your creative process. While the core concept of cutting, gluing, and sealing remains constant, the right supplies can significantly impact the quality and longevity of your finished piece. Let's break down the essentials to help you build your decoupage toolkit.
At the heart of decoupage are your chosen images. These can be incredibly diverse: magazine clippings, printed photographs, wrapping paper, fabric scraps, wallpaper samples, or specialized decoupage papers. The key is to select images that are not too thick, as very heavy cardstock can be difficult to smooth down and may show edges more prominently. Thin paper, like tissue paper or rice paper, works wonderfully for seamless blending. For cutting, a sharp pair of detail scissors is indispensable. These allow for precise cuts around intricate designs, minimizing white edges and creating a professional finish. A craft knife or X-Acto knife can also be useful for straight lines or very fine details, especially when used with a self-healing cutting mat for safety and surface protection.
Next, the adhesive. Decoupage medium is a specialized glue that serves a dual purpose: it glues your images down and acts as a sealant. Brands like Mod Podge are widely recognized and come in various finishes (matte, gloss, satin, outdoor, fabric). While white PVA glue (like Elmer's Glue) can be diluted and used in a pinch, dedicated decoupage mediums offer superior adhesion, flexibility, and a non-yellowing finish. You'll also need brushes for applying the medium. Flat, soft-bristled brushes are ideal for applying glue smoothly without leaving brush strokes. A smaller detail brush can be handy for intricate areas. Keep a bowl of water nearby to clean your brushes immediately after use, preventing the medium from drying and hardening them.
Finally, the protective layers. After applying your images and allowing the glue to dry completely, multiple coats of decoupage medium or a separate varnish are applied to seal and protect the surface. This creates a durable, smooth finish that gives the illusion of a painted design. Sandpaper, specifically fine-grit varieties (220-400 grit), is crucial for achieving that professional, seamless look between varnish layers. Lightly sanding between coats helps to smooth out any imperfections and prepares the surface for the next layer, building up a glass-like finish. Optional items include brayers or plastic scrapers for smoothing out bubbles, a damp sponge for cleanup, and protective gloves for messy applications. With these tools and materials, you're well-equipped to explore the vast possibilities of what is decoupage craft, transforming ordinary objects into personalized treasures.
Transformative Projects: Decoupage Ideas for Every Skill Level
Photo: Thirdman / Pexels
One of the most appealing aspects of what is decoupage craft is its incredible versatility and accessibility for crafters of all skill levels. Whether you're a complete beginner looking for a simple project or an experienced artisan seeking a new challenge, decoupage offers a wealth of creative possibilities. The beauty lies in its ability to transform almost any ordinary object into a personalized work of art, giving new life to forgotten items and adding unique touches to your home decor.
For beginners, starting with simple, flat surfaces is highly recommended. Wooden boxes, picture frames, or even plain ceramic plates (for decorative use only, not food-safe) are excellent choices. Gather some interesting paper napkins – their thinness makes them incredibly easy to work with – or choose some appealing images from magazines. A straightforward project could be decoupaging a plain wooden coaster. Cut out your chosen images, apply a thin layer of decoupage medium to the coaster, carefully place the image, smooth it out, and then seal with several coats. This simple exercise helps you master the basic techniques of cutting, gluing, and sealing without overwhelming complexity. Another great entry point is upcycling glass jars or bottles into decorative vases or storage containers. The smooth surface of glass provides a forgiving canvas, and the transparent nature allows for interesting light effects if using translucent papers.
As you gain confidence, you can move on to more intricate projects and varied surfaces. Furniture upcycling is a popular and rewarding application of decoupage. An old chest of drawers, a plain side table, or even a chair can be dramatically transformed with carefully chosen papers. Imagine a vintage dresser adorned with antique botanical prints or a modern coffee table featuring geometric patterns. When working on furniture, proper surface preparation – cleaning, light sanding, and sometimes priming – becomes even more critical for a lasting finish. Fabric decoupage is another exciting avenue, allowing you to personalize canvas bags, shoes, or even lampshades. Specialized fabric decoupage mediums ensure the material remains flexible after drying. For those seeking advanced challenges, consider decoupaging complex 3D objects like mannequins or intricate sculptures, where careful cutting and precise placement are paramount. Layering images, creating textured effects, or combining decoupage with other techniques like painting or stenciling can also elevate your projects.
Beyond just objects, decoupage can be used to create unique wall art, greeting cards, or even jewelry. The endless supply of paper sources – from vintage maps to comic books, sheet music to children's drawings – means that every project can be truly one-of-a-kind. Decoupage offers a sustainable way to refresh and repurpose items, reducing waste and fostering a sense of accomplishment. It's a wonderful way to express your personal style and create thoughtful, handmade gifts. Explore the vast world of craft projects and discover how decoupage can unlock your creative potential.
Mastering Decoupage: Tips for Success and Avoiding Common Pitfalls
Photo: Sugar Daddy Stock / Pexels
While what is decoupage craft is often touted for its simplicity, achieving professional-looking results requires attention to detail and an understanding of common pitfalls. Mastering a few key techniques and knowing what to avoid can elevate your projects from good to truly exceptional. Here are some essential tips for success and how to troubleshoot common issues.
**Tips for Success:**
* **Preparation is Key:** Always start with a clean, dry, and smooth surface. For wood, light sanding and a coat of primer or base paint can create a better adhesion surface and prevent wood grain from showing through thin papers. For glass or metal, ensure it's free of grease and dust.
* **Precision Cutting:** Take your time when cutting images. Use sharp, fine-tipped scissors for intricate details. The cleaner the cut, the more seamless the image will appear once applied. For a 'no-edge' look, consider tearing certain papers, which can create a softer, blended effect.
* **Thin, Even Glue Layers:** Apply decoupage medium in thin, even coats, both under and over your images. Too much glue can cause wrinkles, while too little won't provide adequate adhesion. Use a soft-bristled brush and work quickly.
* **Smooth Out Bubbles:** Air bubbles are the bane of decoupage. As soon as an image is placed, gently smooth it from the center outwards using your fingers, a brayer, or a plastic scraper. A plastic wrap sheet placed over the image can help you smooth without tearing delicate paper.
* **Multiple Thin Varnish Coats:** Patience is a virtue when it comes to sealing. Apply numerous thin coats of decoupage medium or varnish, allowing each coat to dry completely before applying the next. This builds up a durable, smooth, and professional-looking finish. Sanding lightly with fine-grit sandpaper between the final few coats (after they've fully cured) can help achieve a glass-like smoothness.
**Common Pitfalls and How to Avoid Them:**
* **Wrinkles and Bubbles:** As mentioned, apply thin glue coats and smooth thoroughly. If a wrinkle appears after drying, a light sanding and reapplication of glue/varnish might help, but prevention is best.
* **Tearing Delicate Paper:** When working with very thin papers (like napkins), apply the glue to the surface first, then gently lay the paper on top and apply more glue over it. You can also carefully mist the paper with water before applying to make it more pliable.
* **Yellowing Finish:** Use a high-quality, non-yellowing decoupage medium or varnish, especially for projects exposed to sunlight. Some older glues or certain types of varnish can yellow over time.
* **Sticky Finish:** Ensure each layer of decoupage medium is completely dry before applying the next, and allow the final project to cure fully (this can take several days to weeks depending on the product and humidity) to avoid a tacky surface.
* **Visible Brush Strokes:** Use soft, flat brushes and apply medium in smooth, even strokes. If brush strokes are visible after drying, light sanding and re-varnishing can often correct this.
* **Edges Lifting:** Ensure enough glue is applied right up to the edges of your cut-outs. If an edge lifts after drying, carefully apply a small amount of glue underneath and press down firmly.
By keeping these tips in mind and practicing patience, you'll find that what is decoupage craft can be an incredibly rewarding and forgiving art form, allowing you to create beautiful, lasting pieces with ease.
Comparison
Feature
Decoupage Medium (e.g., Mod Podge)
White PVA Glue (diluted)
Clear Varnish
Adhesion Quality
Excellent, strong bond
Good, but can be weaker
Not designed for adhesion
Sealing/Protection
Excellent, durable, non-yellowing
Moderate, can be less durable
Excellent, very durable
Finish Options
Matte, Gloss, Satin, Outdoor, Fabric
Typically matte or slightly satin
Gloss, Satin, Matte
Ease of Use
Very easy, all-in-one product
Easy, but requires dilution
Easy, but separate product
Drying Time
Fast to moderate
Moderate to slow
Fast to moderate
Water Resistance
Good (especially outdoor formulas)
Limited
Excellent
What Readers Say
★★★★★
"I always wondered what is decoupage craft, and now I'm hooked! I transformed an old, plain jewelry box into a beautiful, personalized keepsake. The process was so relaxing and the results are stunning. Highly recommend this creative outlet!"
Sarah J. · Austin, TX
★★★★★
"Decoupage allowed me to upcycle some old furniture pieces that were just collecting dust. It's amazing how much difference a few paper cut-outs and some sealant can make. My living room has a whole new vibe thanks to this craft."
Mark T. · Seattle, WA
★★★★★
"I used decoupage to create custom wall art for my nursery, incorporating old storybook illustrations. The project turned out exactly as I envisioned, adding a unique and heartfelt touch to the room. It was a wonderful way to personalize the space."
Emily R. · Miami, FL
★★★★★
"Initially, I struggled a bit with getting the images perfectly smooth without wrinkles, but with practice and watching a few tutorials, I got the hang of it. It's a very rewarding craft, though it does require a bit of patience, especially with drying times."
David L. · Denver, CO
★★★★★
"As a teacher, I've used decoupage in my classroom for various art projects, and the kids absolutely love it. It's a fantastic way to teach them about recycling and creativity, and they get to take home something truly special they made themselves."
Jessica B. · Chicago, IL
Frequently Asked Questions
What is decoupage craft, and is it hard to learn?
Decoupage craft is the art of decorating objects by gluing cut-out paper images onto them, then coating them with multiple layers of varnish or sealant to create a smooth, durable finish. It is generally considered an easy craft to learn, making it accessible for beginners, though mastering intricate techniques can take practice. With basic supplies and a little patience, anyone can start decoupaging.
Will decoupage make my items waterproof or food-safe?
While decoupage mediums and varnishes offer good water resistance, most standard decoupage projects are not completely waterproof and are definitely not food-safe. For items that might get wet (like outdoor decor), use specific outdoor decoupage mediums and sealants. For items that come into contact with food, it's best to use them for decorative purposes only, or ensure only food-safe sealants are applied to non-decoupaged areas.
How do I prevent wrinkles and bubbles when decoupaging?
To prevent wrinkles and bubbles, apply decoupage medium in thin, even coats. After placing the image, gently smooth it from the center outwards using your fingers, a brayer, or a plastic scraper. You can also place a sheet of plastic wrap over the image before smoothing to protect delicate papers. For very thin papers like napkins, apply glue to the surface first, then carefully lay the paper on top.
Is decoupage an expensive hobby to start?
No, decoupage is generally a very affordable hobby to start. You can often use materials you already have, like old magazines, newspapers, or fabric scraps. Basic supplies like decoupage medium, brushes, and scissors are relatively inexpensive. Many projects involve upcycling old items, further reducing costs and promoting sustainability.
How does decoupage compare to collage?
While both decoupage and collage involve arranging and gluing paper images, the key difference lies in the finish. Collage often embraces texture and visible layers, with the focus on the arrangement itself. Decoupage, however, aims for a smooth, seamless, and durable finish, where the cut-out images appear to be an integral part of the decorated surface, often achieved through multiple layers of varnish and sanding.
Who should try decoupage craft?
Decoupage craft is perfect for anyone looking for a creative outlet, from children to adults, beginners to experienced crafters. It's ideal for those who enjoy customizing items, upcycling old objects, creating personalized gifts, or simply engaging in a relaxing and rewarding artistic activity that requires minimal specialized skills to get started.
Are there any safety concerns with decoupage materials?
Most modern decoupage mediums are non-toxic and water-based, making them safe for general use. However, it's always wise to work in a well-ventilated area, especially when using spray sealants or oil-based varnishes. Always read the product labels for specific safety instructions, and keep materials out of reach of small children and pets. Wear gloves if you have sensitive skin.
What are the future trends in decoupage craft?
Future trends in decoupage are leaning towards sustainability, with increased use of recycled and natural materials, and a focus on upcycling. Personalization, mixed media applications (combining decoupage with painting, stenciling, or resin), and digital print integration are also gaining popularity. Expect to see more intricate layered effects and a broader range of surfaces being explored by crafters.
Now that you understand what is decoupage craft, from its rich history to essential techniques, it's time to unleash your creativity. Gather your materials, choose a project, and embark on a rewarding journey of transforming ordinary items into extraordinary works of art. Start decoupaging today and discover the joy of this timeless craft!

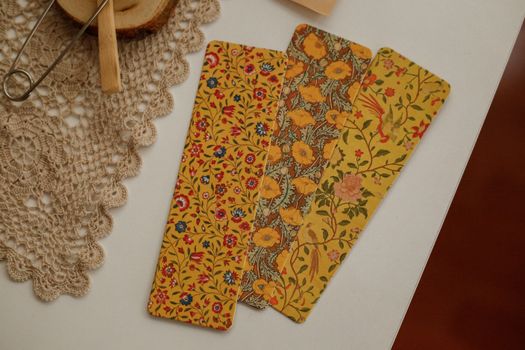 Photo: betül nur akyürek / Pexels
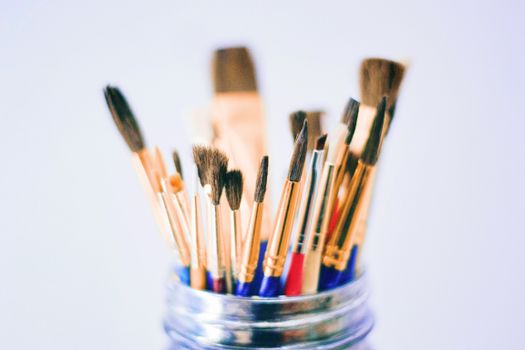 Photo: Em Hopper / Pexels
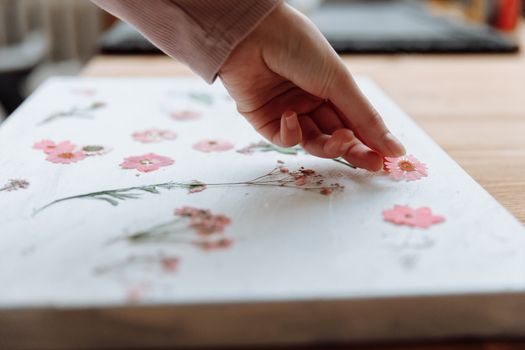 Photo: Thirdman / Pexels
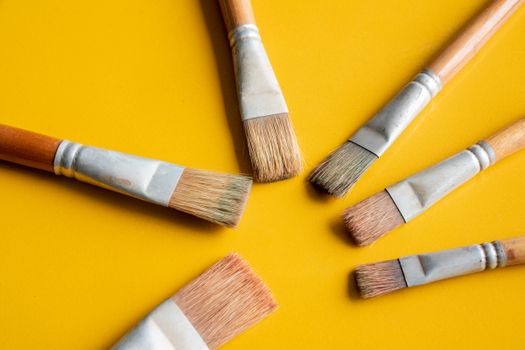 Photo: Sugar Daddy Stock / Pexels