✓ Friendship bracelets are typically made from embroidery floss.
✓ The most common techniques involve knotting patterns.
✓ They symbolize lasting bonds and shared memories.
✓ Customization options are endless, from colors to beads.
How It Works
1
Gather Your Materials
Select your embroidery floss colors, scissors, and a measuring tape. A clip or tape can help secure your work.
2
Choose Your Pattern
Decide on a knotting pattern, from simple candy stripes to intricate chevron designs. Practice basic knots first.
3
Start Knotting
Follow your chosen pattern, consistently tying knots in the correct sequence. Maintain even tension for a neat finish.
4
Finish and Secure
Once the desired length is achieved, braid the ends or create a loop and knot closure. Trim excess floss neatly.
The Enduring Appeal of DIY Friendship Bracelets
Photo: Melike B / Pexels
Friendship bracelets have transcended generations, evolving from simple woven threads exchanged at summer camps to intricate, personalized tokens of affection. Their enduring appeal lies in the thoughtfulness and effort invested in their creation. When you embark on the journey of learning how to make friendship bracelets, you're not just learning a craft; you're engaging in a time-honored tradition of expressing love, loyalty, and connection. Unlike mass-produced items, a handmade friendship bracelet carries a unique story, infused with the creator's time, intention, and specific choices. This personal touch makes them incredibly special to both the giver and the receiver.
The beauty of these bracelets is their versatility. They can be vibrant and playful, subtle and elegant, or even incorporate beads and charms for added flair. The materials are readily available and inexpensive, making it an accessible hobby for everyone, regardless of age or crafting experience. All you truly need is some colorful embroidery floss, a pair of scissors, and a desire to create. Beyond the physical act of knotting, the process itself can be incredibly therapeutic and meditative. It offers a wonderful opportunity to disconnect from digital distractions and engage in a tactile, creative pursuit. The repetitive motion of tying knots can be calming, allowing for a space of focus and mindful creation. Furthermore, it's a fantastic activity to share with friends or family, transforming a solo craft into a shared experience and creating new memories in the process. Imagine a rainy afternoon spent with loved ones, each person selecting colors and patterns, chatting and laughing as bracelets slowly take shape. This communal aspect further enhances the value of the finished product, making it a tangible reminder of a cherished moment.
For those new to crafting, friendship bracelets provide an excellent entry point. The fundamental knots are easy to learn, and mastering them builds confidence for more complex projects. There's a tangible sense of accomplishment as your first bracelet takes form, a small victory that can inspire further creative endeavors. Moreover, the act of giving a handmade bracelet fosters a deeper sense of connection than a store-bought gift ever could. It communicates, "I thought of you, and I spent my time making something just for you." This sentiment is priceless and contributes significantly to the enduring charm of these humble yet powerful symbols of friendship. Whether you're looking to rekindle an old tradition or start a new one, diving into the world of craft friendship bracelets promises a rewarding and heartwarming experience.
Essential Tools and Materials for Your First Bracelet
Photo: Mariah N / Pexels
Before you can master how to make friendship bracelets, gathering the right tools and materials is crucial. Fortunately, the barrier to entry is delightfully low, requiring only a few basic items that are both affordable and widely accessible. The star of the show is undoubtedly embroidery floss. This multi-stranded cotton thread comes in an astonishing array of colors, allowing for endless creative combinations. When selecting your floss, consider the types of bracelets you want to make. For beginners, standard six-strand embroidery floss is perfect. You'll need several colors, typically three to six, depending on the complexity of your chosen pattern. A good rule of thumb is to have at least 60 inches (about 1.5 meters) of each color for a bracelet that fits an average adult wrist, although specific patterns might require more or less. It's always better to have a little extra than to run short mid-project.
Next on your list should be a sharp pair of scissors. Clean cuts prevent frayed ends and make the knotting process smoother. You'll also need a measuring tape or ruler to accurately cut your floss strands to the correct length. Consistency in strand length is important for a neat finish. To keep your work secure and prevent tangles, a method for holding your strands in place is essential. Many crafters use a clipboard, securing the starting knot under the clip. Alternatively, you can tape your starting knot to a table, use a safety pin to attach it to your jeans or a cushion, or even invest in a dedicated bracelet-making board. The key is to have a stable anchor point that allows you to maintain even tension as you knot.
While not strictly necessary for basic patterns, a few optional items can significantly enhance your bracelet-making experience. A small, sharp pair of pliers can be useful if you plan to incorporate beads or charms, helping to open and close jump rings. A bead stopper or a small piece of tape can prevent beads from sliding off your working strands. For more intricate designs or if you find yourself frequently tangling your floss, bobbins or floss organizers can be a game-changer, keeping individual strands neatly wound and easily accessible. Ultimately, the simpler your setup, the easier it is to focus on the fundamental techniques of knotting. Start with the basics, and as your skills grow and your interest deepens, you can gradually expand your toolkit to tackle more advanced designs. Remember, the goal is to enjoy the process of creating a meaningful handmade gift.
Mastering Basic Friendship Bracelet Patterns and Knots
Photo: RDNE Stock project / Pexels
The heart of learning how to make friendship bracelets lies in mastering a few fundamental knots. Once you understand these, a vast world of patterns opens up to you. The two most basic and crucial knots are the forward knot (or right-hand knot) and the backward knot (or left-hand knot). These form the building blocks for almost all traditional friendship bracelet designs. A forward knot is created by taking one strand of floss (the working string) over and under another strand (the base string), forming a '4' shape, and then pulling it tight. Repeating this twice with the same working string on the same base string will create a solid, secure knot. The backward knot is simply the mirror image, forming a 'P' shape, going under and over the base string. Consistency in tying these knots – always two knots per color change or movement – is key to a neat and professional-looking bracelet.
Once you’ve got these down, you can combine them to create the forward-backward knot and the backward-forward knot, which allow your working string to move across the bracelet and then back, or to change direction. These four knots are the entire vocabulary you need for most patterns. With these, you can create the timeless candy stripe bracelet, which is an excellent starting point for beginners. For a candy stripe, you arrange your chosen colors in the order you want them to appear. Then, you simply take the leftmost string and tie two forward knots over every other string, moving from left to right. Once it reaches the far right, it will be the new rightmost string. You then take the new leftmost string and repeat the process. This creates a diagonal stripe effect that is both simple and visually appealing.
Another iconic beginner-friendly pattern is the chevron. This design creates a series of 'V' shapes along the bracelet. To make a chevron, you'll arrange your strings symmetrically, with the same color on the far left and far right, then the next matching colors inwards, and so on. You'll work from both ends towards the center. The leftmost string will tie forward knots across the left half of the bracelet until it reaches the center. Simultaneously, the rightmost string will tie backward knots across the right half of the bracelet until it meets the first string in the center. At the center, these two strings (which are the same color) will meet and tie a final knot (either a forward knot or a backward knot, depending on which way you want the 'V' to point). Then, you repeat the process with the next outermost strings. This creates a beautiful, symmetrical pattern that looks far more complex than it actually is, making it incredibly satisfying for new crafters. Practicing these basic patterns and understanding how the knots dictate the flow of color and design will empower you to tackle more intricate craft projects in the future, building a strong foundation for all your bracelet-making endeavors.
Advanced Techniques and Common Mistakes to Avoid
Photo: Manuel Camacho-Navarro / Pexels
Once you've mastered the foundational knots and basic patterns like the candy stripe and chevron, you're ready to explore more advanced techniques in how to make friendship bracelets. This can include incorporating beads, creating more intricate patterns like zigzags, diamond patterns, or even learning to read complex pattern charts. Adding beads requires a slightly different approach; you’ll typically string the bead onto one of your working strands before tying the knot around it, securing it in place. Experiment with different bead sizes and materials to add texture and sparkle to your designs. Another advanced technique involves creating braided or twisted sections within your knotted bracelet, offering a dynamic contrast in texture and visual interest. Learning to create adjustable closures, such as a square knot closure or a button loop, will also elevate the professionalism and wearability of your finished bracelets.
However, as you delve into more complex designs, it's easy to fall into common pitfalls. Awareness of these can save you frustration and lead to a more polished end product. Here are some common mistakes to avoid:
* **Inconsistent Tension:** This is perhaps the most frequent issue. If your knots are too loose in some areas and too tight in others, your bracelet will look uneven, bumpy, and may not lie flat. Strive for consistent, firm tension with every knot. Practice is key to developing this muscle memory.
* **Skipping Knots:** Each knot in a sequence typically requires two ties with the working string around the base string. Forgetting to tie the second knot will result in gaps, misaligned colors, and a weak structure that can unravel easily.
* **Incorrect Knot Direction:** Especially when learning forward-backward or backward-forward knots, it's easy to tie the wrong knot or reverse the direction. This will disrupt your pattern and can be difficult to correct without undoing several knots.
* **Running Out of Floss:** Underestimating the length of floss needed is a common beginner mistake. Always cut your strands longer than you think you’ll need. It's much easier to trim excess than to try and splice in new floss, which can look messy.
* **Tangles and Knots in Working Strands:** As you work, especially with longer strands, your floss can easily become tangled. Periodically untangle your working strings, or use bobbins to keep them organized, preventing frustrating knots that can damage the floss or require you to cut and restart.
* **Not Securing the Start/End:** A poorly secured starting knot can unravel, and an unfinished end will leave your bracelet unusable. Always ensure your initial knot is tight and that your closure method (braids, loops, or clasps) is robust.
By being mindful of these potential issues and practicing diligently, you'll quickly improve your skills and create beautiful, durable friendship bracelets that you and your friends will cherish.
Comparison
Feature
Embroidery Floss (Traditional)
Waxed Cord (Durable)
Paracord (Heavy Duty)
Stretch Cord (Easy On/Off)
Material Cost
Very Low
Low
Moderate
Moderate
Durability
Moderate (can fray)
High (water resistant)
Very High (outdoor use)
Moderate (can snap)
Comfort
Soft, flexible
Slightly stiffer
Bulkier, less flexible
Very comfortable
Knot Detail
Excellent, fine detail
Good, defined knots
Larger, less intricate
Limited to simple knots
Ease of Use
✓
✓
✗
✓
What Readers Say
★★★★★
"This guide truly breaks down how to make friendship bracelets into easy, understandable steps. I've always wanted to learn, and now I'm making beautiful gifts for all my friends. The tips on tension were a game-changer for my knot consistency!"
Sarah J. · Austin, TX
★★★★★
"As a complete beginner, I found the instructions incredibly clear and the pattern suggestions perfect for starting out. My first candy stripe bracelet turned out surprisingly well, and I'm already planning my next one. It's a fun and relaxing hobby."
Mark D. · Portland, OR
★★★★★
"After following this article, I successfully created 5 unique friendship bracelets for my best friends' birthdays. Each one was personalized with their favorite colors, and they absolutely loved the handmade touch. The section on avoiding common mistakes was particularly helpful."
Jessica L. · Miami, FL
★★★★★
"The guide is very thorough and covers all the essentials. I appreciated the detailed breakdown of knots. While I wish there were a few more advanced pattern examples, it provided a solid foundation for me to explore further on my own. Great resource overall!"
David K. · Denver, CO
★★★★★
"I used to make these as a kid but had forgotten all the techniques. This article was a fantastic refresher! I'm now teaching my own kids how to make friendship bracelets, and we're having a blast creating together. It's a wonderful way to bond."
Emily R. · Chicago, IL
Frequently Asked Questions
What is the best type of string to use for friendship bracelets?
Embroidery floss (also known as embroidery thread or stranded cotton) is overwhelmingly the most popular and recommended material. Its smooth texture, wide range of colors, and ease of knotting make it ideal for intricate patterns. While other materials like waxed cotton cord or thin yarn can be used, embroidery floss provides the best results for traditional designs.
My bracelet keeps tangling. How can I prevent this?
Tangling is a common frustration! To prevent it, try cutting your strands to a manageable length – typically no more than 60-70 inches per strand for beginners. You can also use bobbins to wind individual strands, which keeps them neat and prevents them from getting intertwined. Periodically untangle your working strings as you go, rather than waiting for a big mess.
How do I make a friendship bracelet without a clipboard?
There are several ways to secure your bracelet if you don't have a clipboard. You can tape the starting knot to a sturdy surface like a table or a book. A safety pin can be used to attach the knot to your jeans, a pillow, or a cushion. Some people even use a binder clip or a heavy object to hold the starting point down. The goal is a stable anchor to maintain tension.
How much does it cost to start making friendship bracelets?
The initial cost is very low, making it an incredibly accessible hobby. A pack of assorted embroidery floss can cost as little as $5-$15, and you likely already own scissors. If you need a measuring tape, it's usually under $5. You can get started for under $20, making it a budget-friendly creative outlet with endless possibilities.
Are friendship bracelets only for kids, or can adults wear them?
Absolutely not! While popular with children and teens, friendship bracelets are widely worn by adults as a fashion statement, a symbol of connection, or a nostalgic accessory. Many adults appreciate the handmade quality and the sentimental value. There are also sophisticated patterns and color combinations that appeal specifically to adult tastes, proving their universal appeal.
Who should learn how to make friendship bracelets?
Anyone can learn how to make friendship bracelets! It's an ideal craft for beginners of all ages, offering a low-cost, low-stress entry into the world of crafting. It's particularly great for those looking for a relaxing hobby, a way to create personalized gifts, or a fun activity to share with friends and family. No prior experience is necessary, just a willingness to learn and a bit of patience.
Is it difficult to correct mistakes in friendship bracelets?
Correcting mistakes can be a bit tricky, especially if you've tied many knots after the error. For small errors, you can often carefully unpick the knots using a needle or a pin. For larger mistakes, it might be more efficient to undo a section of the bracelet and restart from a correct point. Learning to identify mistakes early saves a lot of backtracking.
What are some emerging trends in friendship bracelet designs?
Beyond traditional patterns, current trends include incorporating natural elements like small wooden beads or gemstones, using metallic or glow-in-the-dark floss, and exploring macrame-inspired techniques for more textured designs. Personalized bracelets with initial charms or specific color combinations representing birthstones or causes are also increasingly popular, making them even more meaningful.
Ready to weave connections and express your unique bonds? Dive into the rewarding world of crafting and discover how to make friendship bracelets. With our comprehensive guide, you have everything you need to start creating beautiful, heartfelt keepsakes today.

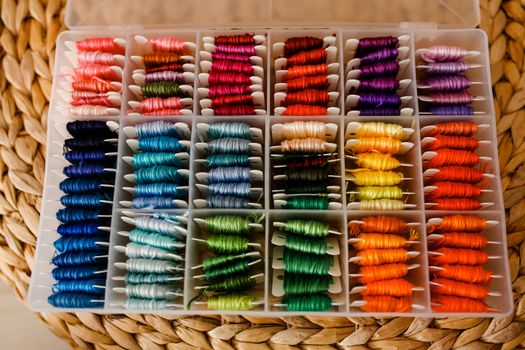 Photo: Melike B / Pexels
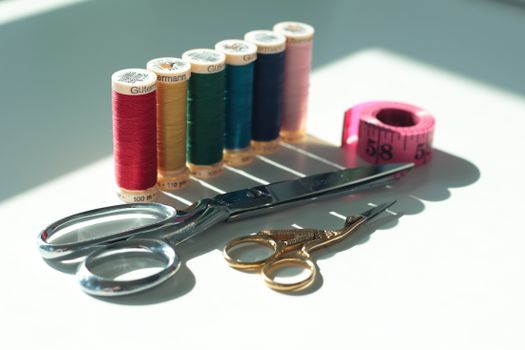 Photo: Mariah N / Pexels
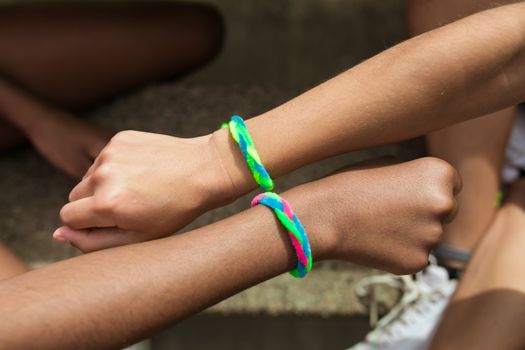 Photo: RDNE Stock project / Pexels
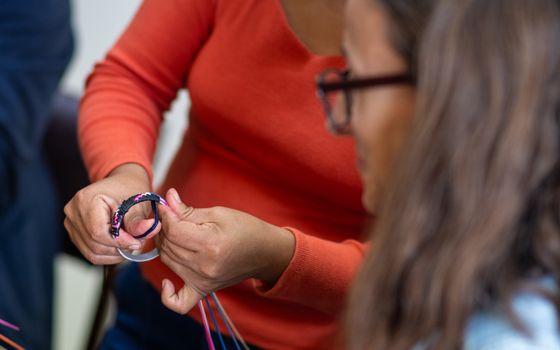 Photo: Manuel Camacho-Navarro / Pexels