Mastering Your Craft: How to Make a Craft Table
how to make a craft table

Mastering Your Craft: How to Make a Craft Table

Transform your creative space with a custom-built craft table designed for maximum efficiency and personalized storage.

Start Building Today!

Key Takeaways

  • ✓ Custom craft tables offer tailored storage and workspace.
  • ✓ Material choice impacts durability, aesthetics, and cost.
  • ✓ Basic woodworking skills are sufficient for many designs.
  • ✓ Proper planning prevents common building mistakes.

How It Works

1
Define Your Crafting Needs

Assess the types of crafts you do, the tools you use, and the amount of space required. This initial assessment guides your design choices, ensuring the table meets your specific functional demands.

2
Choose a Design & Gather Materials

Select a table design that aligns with your needs and skill level, then create a detailed materials list. Purchase all necessary lumber, hardware, and tools before beginning construction to streamline the process.

3
Measure, Cut & Assemble

Carefully measure and cut all lumber according to your design plans, ensuring precision for a sturdy build. Assemble the table frame, attach the tabletop, and integrate any storage components using appropriate joinery techniques.

4
Finish & Organize Your Space

Apply a protective finish to your newly built craft table, such as paint, stain, or sealant, to enhance durability and appearance. Finally, organize your tools and materials on and around the table to create an efficient and inspiring creative environment.

Planning Your Perfect DIY Craft Table Design

An artisan sketches designs at a workbench in a woodworking shop filled with tools. Photo: Tima Miroshnichenko / Pexels
Embarking on the journey of how to make a craft table begins long before you pick up a saw; it starts with meticulous planning. The most successful DIY projects are those where the end-user's needs are thoroughly understood and integrated into the design from the outset. Think about your crafting habits: Do you spread out large fabric pieces for quilting, or do you focus on intricate jewelry making that requires small, organized compartments? Perhaps you’re a painter needing ample clear space, or a scrapbooker with an extensive collection of papers and embellishments. Your craft dictates the fundamental requirements of your table. Consider the size of your space. A tiny corner in an apartment will demand a different solution than a dedicated craft room. Measure the available area carefully, accounting for walkways, opening doors, and other furniture. Will your table be a permanent fixture, or do you need it to be mobile, perhaps on casters, or even foldable to reclaim space when not in use? These practical considerations are paramount. Next, delve into storage. This is often the make-or-break feature of a craft table. Do you need open shelving for easy access to bins, drawers for hidden clutter, or pegboards for hanging tools? Vertical storage is a game-changer for maximizing space, especially in smaller areas. Think about integrating power outlets for hot glue guns, cutting machines, or lamps. A built-in power strip can eliminate tangled cords and improve safety. The height of your table is another critical ergonomic factor. Will you be sitting or standing? A standard desk height (around 29-30 inches) is suitable for sitting, but if you do a lot of cutting or standing work, a counter-height (36 inches) or even bar-height (42 inches) table might be more comfortable and reduce back strain. Some advanced designs even incorporate adjustable height mechanisms, though this adds complexity and cost. Don't forget about durability and surface material. A cutting mat is essential for protecting your tabletop, but the table itself should withstand spills, glues, and general wear and tear. Laminate, butcher block, or even a sturdy plywood top can be excellent choices, often protected further with a clear sealant or a large, dedicated cutting mat. Finally, consider your budget. DIY projects can range from incredibly affordable, using repurposed materials, to more expensive, involving high-quality lumber and specialized hardware. Set a realistic budget early on, as this will influence your material choices and design complexity. By thoroughly answering these questions, you lay the groundwork for a craft table that isn't just a piece of furniture, but a highly functional extension of your creative process. For more ideas on organizing your space, check out our guide on craft room organization ideas.

Selecting Materials and Essential Tools for Your Build
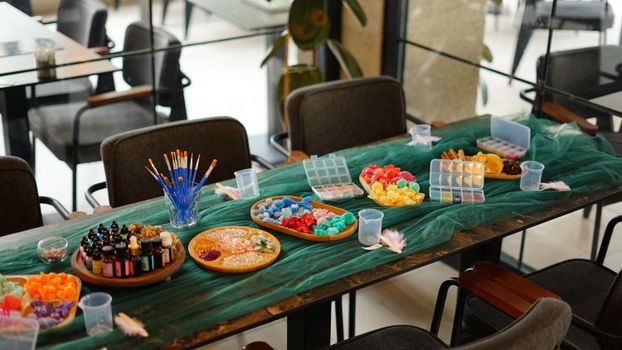
A well-organized craft table displaying vibrant art supplies like beads and brushes, perfect for creative projects. Photo: Mina Başer / Pexels
Once your design blueprint is complete, the next crucial step in how to make a craft table is gathering the right materials and tools. The choices you make here will directly impact the table's stability, longevity, and overall aesthetic. For the tabletop, several options stand out. Plywood is a popular and cost-effective choice, especially Baltic birch plywood, known for its strength and smooth finish. MDF (Medium-Density Fiberboard) is another economical option, offering a very smooth surface, but it's less resistant to moisture and can be heavy. Solid wood, such as pine, oak, or maple, provides superior durability and a beautiful natural look but comes at a higher price point. Butcher block countertops, often found at home improvement stores, are excellent for a durable, attractive, and easily cleanable surface. For the frame, dimensional lumber like 2x4s or 2x2s are common for sturdy construction. If you're building cabinets or shelves as part of your design, cabinet-grade plywood or melamine-faced particle board are good choices for their smooth surfaces and ease of cleaning. Hardware is equally important. Screws are typically preferred over nails for stronger, more secure joints in furniture construction. Wood glue should be used in conjunction with screws for maximum joint strength. Consider specialized hardware like drawer slides (full extension for easy access), hinges for cabinet doors, and casters if you want a mobile table. Adjustable leveling feet are also a great addition for ensuring stability on uneven floors. Now, let's talk tools. While the specific tools will vary based on your design's complexity, some are universally essential for any DIY craft table project. A circular saw or miter saw is indispensable for making accurate, straight cuts in lumber. A drill/driver is needed for pre-drilling pilot holes and driving screws. Measuring tapes, a carpenter's square, and a pencil are fundamental for marking and ensuring precision. Safety glasses and hearing protection are non-negotiable for any woodworking project. Depending on your design, you might also need a jigsaw for curved cuts, a sander (orbital or belt) for smoothing surfaces, clamps to hold pieces together while glue dries, and a router for decorative edges or dado cuts for shelves. If you're building drawers, a Kreg Pocket Hole Jig can simplify joinery and create strong, concealed connections. Don't forget finishing supplies: sandpaper in various grits, wood filler for imperfections, primer, paint or stain, and a clear protective sealant like polyurethane or varnish. Investing in good quality tools, even if rented for a single project, can make a significant difference in the ease of construction and the quality of the finished product. Proper material selection and tool preparation are the backbone of a successful build, setting you up for a smooth and rewarding crafting experience.

Step-by-Step Construction: Building Your Custom Craft Station

A top view of various woodworking tools and materials on a white table. Photo: https://kaboompics.com/ / Pexels
With your design finalized and all materials and tools at hand, it’s time to dive into the exciting phase of construction. Building your custom craft station, when approached systematically, can be a highly rewarding experience. Start by carefully cutting all your lumber according to your detailed cut list. Precision here is key; measure twice, cut once. Use your circular saw or miter saw for straight, clean cuts. Label each piece as you cut it to avoid confusion later. Once all pieces are cut, it’s often beneficial to do a dry fit of the main frame components. This allows you to identify any discrepancies or areas that need adjustment before applying glue and fasteners. Begin assembling the main frame of the table. This typically involves connecting the legs to the aprons (the horizontal pieces connecting the legs) using screws and wood glue. Pocket hole joinery is an excellent method for strong, concealed joints. Apply wood glue to all mating surfaces before driving screws to create a bond that is stronger than screws alone. Use clamps to hold pieces firmly in place while you work. Ensure all corners are square using your carpenter's square as you assemble each section. Once the basic frame is stable, you can proceed with adding any shelves, drawers, or cabinet components. For shelves, you might use dado joints, shelf pins, or simple cleats. If building drawers, assemble the drawer boxes first, ensuring they are square and glide smoothly in their intended openings. Install drawer slides according to the manufacturer's instructions, paying close attention to alignment for effortless operation. Attaching the tabletop is the final structural step. Depending on your design, you can secure the top to the frame using screws driven up through the aprons into the underside of the tabletop. For solid wood tops, use Z-clips or figure-8 fasteners to allow for seasonal wood movement, preventing warping or cracking. Once the table is fully assembled, it’s time for sanding. Start with a coarser grit sandpaper (e.g., 80 or 100 grit) to remove any major imperfections, glue squeeze-out, or rough edges. Gradually move to finer grits (e.g., 150, then 220 grit) for a smooth, ready-to-finish surface. Wipe down the entire table with a tack cloth to remove all dust before applying your chosen finish. Apply primer if you plan to paint, then follow with several thin coats of paint or stain, sanding lightly between coats for a professional finish. Finally, apply a durable protective topcoat, such as polyurethane or varnish, to guard against spills and wear. This meticulous approach ensures your DIY craft table is not only functional but also a beautiful and enduring piece for your creative endeavors. For more detailed woodworking tips, explore resources on basic woodworking techniques.

Maximizing Functionality: Storage, Ergonomics, and Maintenance Tips

Glass jar with paintbrushes on desk with paint tubes in professional art workshop Photo: Anna Shvets / Pexels
Building your craft table is just the beginning; maximizing its functionality through smart storage, ergonomic considerations, and proper maintenance will ensure it remains a creative sanctuary for years to come. Effective storage is paramount in a craft space. Think vertically. Wall-mounted pegboards, magnetic strips for small metal tools, and overhead shelving can free up valuable tabletop space. Incorporate a variety of storage solutions: clear plastic bins allow you to see contents at a glance, drawers keep clutter out of sight, and open shelves provide easy access to frequently used items. Consider custom-sized cubbies for specific tools or materials, like rolls of vinyl or large paper pads. Labeling everything is a simple yet powerful organization hack that saves countless hours searching for supplies. Ergonomics play a significant role in comfort and preventing strain during long crafting sessions. Ensure your table height is appropriate for your primary working posture, whether sitting or standing. If you alternate, consider an adjustable-height stool or chair. Good lighting is crucial; natural light is ideal, but supplement with task lighting that illuminates your work area without casting shadows. Position your most-used tools within easy reach to minimize stretching and repetitive movements. A comfortable chair with good lumbar support is an investment in your well-being. Maintenance is key to preserving your craft table. Regularly wipe down surfaces to remove dust, glitter, and adhesive residue. For painted or stained surfaces, use mild soap and water. If you have a butcher block top, periodic oiling will keep it conditioned and resistant to moisture. Always use a cutting mat when cutting with blades to protect the tabletop. Address spills immediately, especially those involving glues or paints, to prevent permanent damage. Periodically check and tighten any screws or fasteners that may have loosened over time. If your table is on casters, keep them clean and free of debris to ensure smooth movement. By implementing these storage, ergonomic, and maintenance strategies, your custom-built craft table will not only be a functional workspace but also an inspiring and comfortable environment that enhances your creative flow and supports your crafting passion for years to come. Remember, a well-organized and maintained craft space is a happy craft space, ready for any project you throw its way.

Comparison

FeatureDIY Custom BuildPre-made Craft TableRepurposed Furniture
CustomizationPartial
Cost (approx.)$100-$500$200-$1000+$50-$300
Skill LevelIntermediateNoneBeginner-Intermediate
Storage OptionsUnlimitedLimitedVariable
DurabilityHigh (material dependent)Medium-HighVariable
Time InvestmentHighLowMedium

What Readers Say

"Following this guide, I built a craft table with built-in cubbies and a large cutting surface. It transformed my small studio, making everything so accessible and organized. I can't believe I waited so long to learn how to make a craft table!"

Sarah J. · Austin, TX

"The detailed instructions on material selection were incredibly helpful. My new DIY craft table is sturdy, perfectly sized for my sewing machine, and has all the storage I need. It's truly a game-changer for my hobby."

Mark T. · Portland, OR

"I used the tips for ergonomic design and added casters to my table, and now I can easily move it around my apartment. This project saved me hundreds compared to buying a similar table, and it fits my space perfectly."

Jessica L. · Miami, FL

"Building my own craft table was a bit more challenging than I expected, especially getting all the cuts perfectly square. However, the end result is a highly functional workspace that I'm proud of, even with a few minor imperfections."

David M. · Denver, CO

"As a jewelry maker, I needed a table with specific small compartments. This guide inspired me to customize my design, and now I have a dedicated station for all my beads and tools. Learning how to make a craft table was the best decision for my business."

Emily R. · Chicago, IL

Frequently Asked Questions

What is the best material for a craft table top?

The best material depends on your craft. Plywood (especially Baltic birch) or butcher block are excellent for durability and versatility. MDF is good for smooth surfaces but less moisture-resistant. Laminate tops offer easy cleaning and protection against spills.

Is it cheaper to build or buy a craft table?

Generally, building a craft table can be significantly cheaper than buying a comparable pre-made one, especially if you have some tools already or can source materials affordably. However, the cost savings depend on your design's complexity and material choices.

How do I make my craft table mobile?

To make your craft table mobile, simply attach heavy-duty locking casters to the bottom of each leg. Ensure the casters are rated for the table's weight, including any stored items, and that they can lock securely to prevent unwanted movement during use.

What's the ideal height for a craft table?

The ideal height depends on whether you primarily sit or stand. A standard desk height (29-30 inches) is good for sitting, while a counter-height (36 inches) or bar-height (42 inches) is better for standing or using a tall stool. Consider an adjustable-height option for maximum flexibility.

How can I add storage to an existing craft table?

You can add storage to an existing table by attaching pegboards to the sides or back, adding rolling carts underneath, installing under-table shelves or drawers, or using wall-mounted units above the table. Vertical storage is key for maximizing space.

Who should consider building their own craft table?

Anyone with specific space constraints, unique storage needs, a desire for a custom aesthetic, or a limited budget should consider building their own craft table. It's also a rewarding project for those who enjoy DIY and want a truly personalized workspace.

What safety precautions should I take when building a craft table?

Always wear safety glasses and hearing protection when using power tools. Ensure your workspace is clear and well-lit. Use clamps to secure wood pieces, and read all tool manuals before operation. Disconnect power tools when changing blades or making adjustments.

Will a DIY craft table increase my productivity?

Yes, a well-designed DIY craft table can significantly increase productivity. By having a workspace tailored to your specific needs, with optimized storage and ergonomic considerations, you spend less time searching for tools and more time creating, leading to a more efficient and enjoyable crafting experience.

Ready to transform your crafting experience? By following this comprehensive guide on how to make a craft table, you can build a personalized, efficient, and inspiring workspace. Start planning your custom design today and unlock your full creative potential!

Topics: how to make a craft tableDIY craft tablebuild craft deskcraft room organizationcustom craft station
Leo List

IE Escorts NO Escorts US Escorts NZ Escorts AU Escorts
Brampton weed
Adultwork EstrelaBet Vai de Bet R7 Bet Betão Galera Bet Rainbet Bet9ja Shop SportyBet BetKing Sisal Loto Foot Hollywoodbets YesPlay Odibets RushBet Jugabet BetWarrior BetCity MSport betPawa Fortebet